

Project 3 - DBZ Saiyan Battle Armor
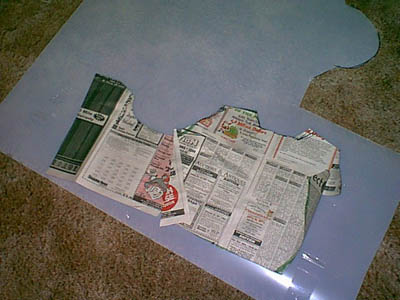
This was a project which, unlike all my other projects, I had to make using measurements sent to me from someone I never met in person. Fortunately, it's a simple costume (and it's for a guy, so it has none of that troublesome darting you have to put up with when you're making costumes for them shapely female types.) First thing I did was measure out the pattern onto a sheet of newspaper, which I then cut and laid over a sheet of polystyrene.
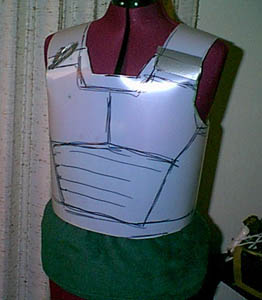
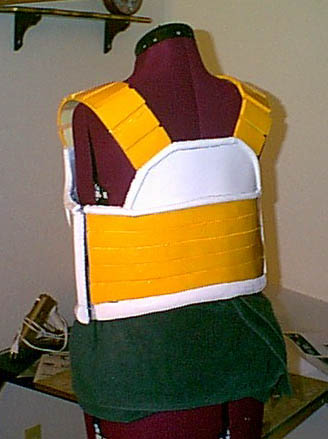
This a little different from the way I did things before in the Lady Chris armor, when I made the foam underpattern first. Once I had cut the pattern out, I taped the seams together and wrapped it around a dressmaker's form to get the final fitting. This armor has a segmented appearance, so at this time, I took a magic marker and worked out how all the sections of the armor would be placed and what it's final appearance would be.
Now came the hard/fun part. I cut sections of 6mm craft foam and hotglued them to the armor over the markered sections, leaving about 1/2" of space in between each of the sections. With that done, I overlaid the craft foam with plastic sheeting to create a smooth-looking, easily paintable surface. (Then, for additional security, I made a few discreet stiches at the corners of the sections to keep the foam and plastic sheeting attached to the plastic armor base underneath.)
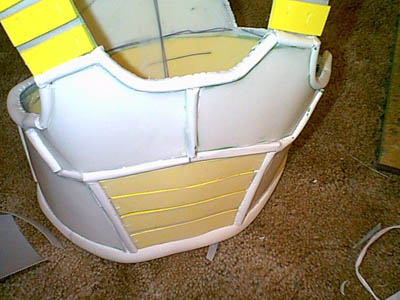
The next thing I did was take long strips of 1/4" craft foam, fold them in half and then glued the edges together to form a kind of cylinder. I then took the cylinders and glued them in between the sections of the armor as shown. I wasn't able to cover them with plastic sheeting, (as I couldn't get the sheeting to curl in that tight a radius) so I painted over the cylinder sections with clear resin (one of the very few times I've ever touched the stuff.)
One gets in and out of the armor using a side closure which I made by extending the plastic underlayer forward a couple of inches and gluing/sewing the lower halves of some extra heavy-duty (3/4") snaps to it. (The upper halves of the snaps I glued/sewed to the inside of the armor which overlaps this section.)
Next Project: Vincent Valentine Claw and Foot Armor
Okay, as much as I feel that DBZ has been overcosplayed, I was looking for something new to do and received a request from someone at the Cosplay.com message board to create a simple Saiyan Chest Protector. Here's a reference pic for what I ended up trying to make, (if you're one of the .000000001 percent of humanity who's been living under a rock for the past ten years and who has no idea what a Dragonball Z character in battle armor looks like:)


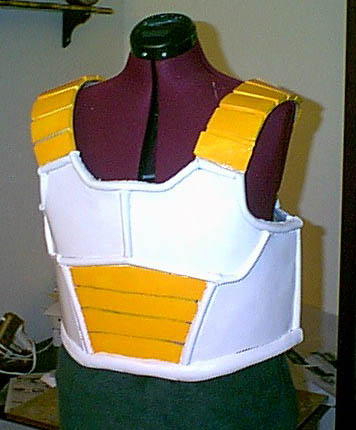
Here are some pictures of how it looked after I painted it with Testor's enamel.
SUPPORT THIS PAGE!
All anime characters featured are copyright their respective owners.
All costumes created by and all pictures property of Amethyst Angel c. 2005
