

Project 4 - Vincent Valentine Claw and Foot Armor
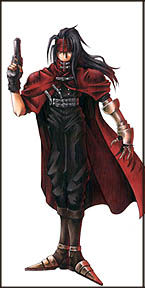
The idea for this project came after I received an e-mail from a reader, asking for suggestions on how they might go about putting together a Vincent Valentine claw. (Vincent Valentine, for those of you who are among the .00000013% of the human race who has never heard of or played the Final Fantasy video game series, is this guy:)
Hm, thought I, upon my first viewing of the above picture, that claw thingie sure looks like it would make for a neat armoring project. And what better way to explain how something can be done, than by doing it yourself?
I fastened the edges of each claw together using hot glue. It was a long, slow (and at times, painful) process. But at the end, I had something which at least remotely resembled a claw. To further reinforce the seams of the claw, I took small strips of plastic, bent them, applied dabs of a non-heat industrial glue (E-6000) to them and attached them to the inner edges of the claw like support beams. This takes a very steady hand, (not to mention incredibly small fingers, or a tweezers.) Make sure when all is said and done that you still have enough room in the claw for the tip of your finger to fit into it.
I made two sets of tubes- one that covered the upper knuckle joints and one that covered the lower knuckle joints. The tubes covering the lower knuckle joints should be made to have a lip about 1/4" high situated close to the knuckle.
Okay, you've got all the claws and finger joint pieces made. The next thing you do is paint them with Testor's gold model paint or spray paint. (Make sure you take the joint pieces OFF the glove before you attempt to spray them.) Once the paint has dried, coat the painted surfaces with a spray sealant. Let dry.
The next step was to attach studs to the claw. For studs, I just used regular denim decorating studs, the kind commonly found at fabric stores. (Just dab some glue to the spikes and jam them into the plastic sheeting where they belong.) Apply paint and sealant.
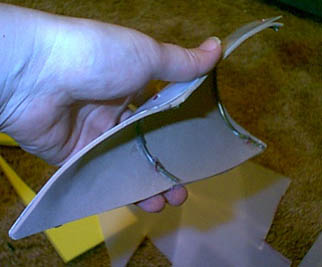
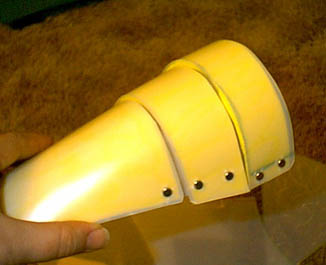
As a bonus, I also created segmented foot armor. This I created using many of the same methods outlined above. I wrapped newspaper around a boot to get a proper form for the base of the armor. I then cut out a triangle of 1/8" craft foam which I then covered with plastic sheeting. I then bent it and reinforced it with some coathanger wire cut and bent into an arc shape and glued to the underside.
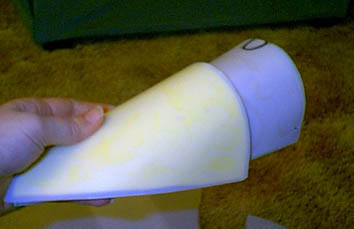
I then cut out segments of thicker, 1/4" craft foam and applied them over the base
After gluing on the segments, I glued on a few studs. I also sewed/glued a strap of black elastic to the bottom of the armor so that it would remain secure to the boot it was attached to (although I'm thinking it might have to be glued to the boot as well for additional security.
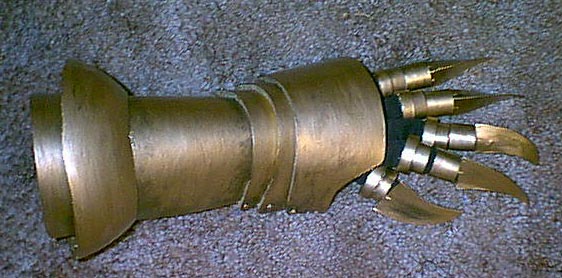
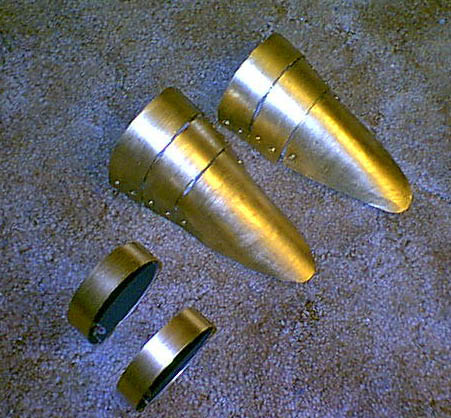
The last thing to be made were a pair of thin shin cuffs which I made out of 1/8" craft foam and covered with plastic sheeting. (They open and close by means of a snap I sewed/glued to the strip) This is what all the foot armor looks like after it's been painted:
Next Project: Sun Shang Xiang Chakrams
And thus I embarked upon what would turn out to be my most ambitious (and emotionally trying) armoring project at that time.
Here's how it all went down.
I wound up designing the claw so that it was made up of two sections: The glove section and the forearm section. First, we'll deal with the glove section.
The first thing to do is to get yourself a black wrist-length work glove, the kind you'd find at any hardware store. (you could use a leather glove but it's going to be awful hot to wear.) This is what you will glue all the claw pieces and finger joints to.
Step Two is to make the claws. First problem: how to get them to look curvy and menacing (as opposed to having it look like you just stuck a bunch of Bugles snack chips on the tips of your fingers). One possibility, thought I, would be to mold them out of a pliable substance and cast them out of resin using a plaster mold. (This was not my favored method of manufacture, seeing as how the last time I tried casting anything out of resin, I wound up making a mess which all but guarantees I will never get the damage deposit on my apartment back.) Another possibility, thought I, would be to create the claws using a non-mold method. This I accomplished by cutting out three triangles of polystyrene/plastic sheeting and gluing them together. (If you don't have plastic sheeting, hard tagboard would probably suffice. Just don't expect it to be as durable.) Two of the triangles were claw-shaped, the third was a spacer I had placed on the bottom of the claw to create enough room to pass the tip of my finger through. When fitting the claws to your fingers, make sure you're wearing the aforementioned black work glove I told you to pick up in step one or in all likelihood, you won't make them big enough.
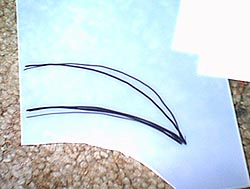
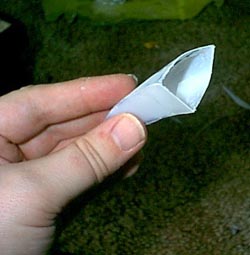
Once the glue had dried, I took some fine sandpaper and sanded the edges of the claw smooth. Viola. One claw down. Only four more to go.
After the making of the claws, comes the making of the finger joints. These I made by taking a strip of 1/8" craft foam about 3/4" high and gluing a layer of plastic/polystyrene sheeting over it. I then rolled it into a tube and glued the edges shut (making sure, of course, that the tube would fit around the circumference of my finger while I had the black work glove on.)
(Note: The thumb, due to it's shortness, should only have a lipped, lower-knuckle finger joint wrapped around it, meaning you'll only have to create 4 upper knuckle joint pieces.) Is any of this making sense? I hope so.
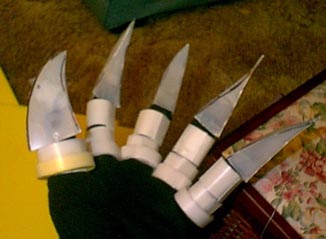
All that's left to finish this part of the armor is to assemble the glove. This you will do by putting on the glove, sliding the pieces onto it in the proper order and gluing them on as carefully as you can. (I recommend a tacky or non-heat related glue, as hot glue can be quite uncomfortable next to your skin even if there IS a glove covering it.) To attach the claws, apply glue to the tips of the fingers and cram them into the claws. Afterwards, for additional security, take a needle and thread and sew the claws (you'll have to poke small holes in the sides of them) to the tip of the glove using small, discreet stitches, one on either side of the finger. Dab some gold paint over the stitches and viola.
Now we move onto the next section of the armor: the forearm. The forearm is made using thicker (1/4") sheets of craft foam which are then covered with polystyrene/plastic sheeting. As I've said elsewhere on this site, you can get a good bend effect by putting hot glue on the outer surface of the foam and then pressing it into a larger piece of plastic sheeting, curving it with your hand and holding it in place as it cools so it retains a cylindrical shape. After it cools, you then cut away any excess plastic sheeting hanging over the edges.
For the forearm armor, I created a half-cylinder for the base. At one end, towards the cuff of the wrist, I sewed black elastic. At the other end of the base is a round cuff which wraps the entire circumference of the arm. This I made by cutting out a section of curvy plastic from a 10" novelty plastic Christmas ornament. (A plastic bowl would probably work just as well.) I reinforced the round plastic cuff by gluing 1/4" foam sheeting to the inside of it. I then glued the cylindrical forearm base to the inner edge of the round cuff. (Making sure all the time I still had room to pass my arm through it.) To finish the forearm section, I cut out more layers of foam, covered them with plastic sheeting, and then layered them over the cylindrical base near the wrist. I sewed them together with small stitches (tacking the edges of the plates down as shown, for maximum mobility.)
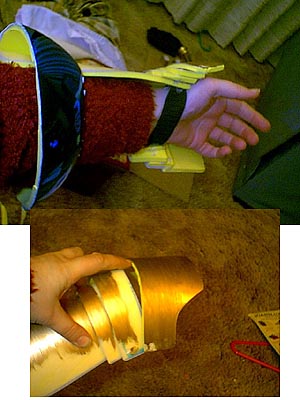
To put on the armor, you slide your arm into the forearm piece first, and then slip the glove on, tucking the wrist cuff of the workglove under the black elastic. Viola. Here's what it should look like.
SUPPORT THIS PAGE!
All anime characters featured are copyright their respective owners.
All costumes created by and all pictures property of Amethyst Angel c. 2005

