Armor-Making for the Fiberglass-Phobic
Project 5 - Zelda Armor from the Legend of Zelda
I've been receiving a lot of requests to explain this one in more detail. This project, like most armoring projects I do, was originally undertaken as an experiment which I hoped would give me more insight on the material I was working with, (and which I hoped I would be able to sell for big bucks on ebay.)
By far the greatest hurtle I had to surmount while working on this project was finding a decent Zelda Armor reference picture.

For some unexplained, (and seemingly sadistic) reason, no two pictures of the lady seemed remotely alike. Thus the final design of the armor was as much a product of my own imagination as it was a faithful recreation of..well.. what it was I was trying to recreate.
The first step in building the armor was to determine it's shape, width, and how many parts it was going to be made of. This I did by draping newspaper and plastic sheeting over my shoulders and drawing the pattern with a marker. This is an inexact science at best, and, is best done with the help of a friend. (Unless you're like me, and HAVE no friends, in which case you're stuck doing it yourself.)
Upon creating the separate pieces of the pattern, I cut them out of foam and hotglued a layer of plastic sheeting over them. (Don't know why I didn't get any pictures of this part of the process. Just imagine in your mind a curvy piece of foam covered with smooth plastic and you'll have a good approximation of what you should have at this point in the process.)
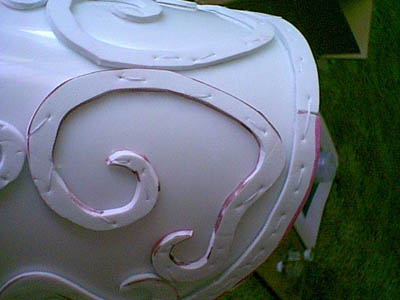
Next thing you have to do is create the raised design on the armor. This can be done by taking a 2mm sheet of craft foam and cutting it into little swirly strips. Then you hotglue the swirlies to the surface of the armor. (Stop me if I'm getting too technical here.) When the glue cools, take a thick needle and thread and sew the strips down to the armor for added security as shown above. (For EXTRA added security, take the hotglue gun and drop beads of glue along the threads at the back of the armor to hold them in place.)
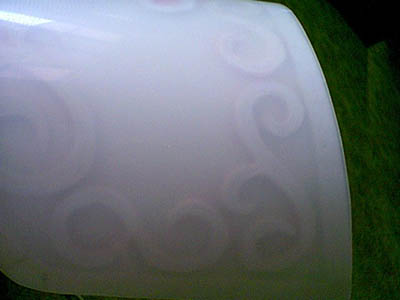
Next, you cover all the swirly strips with glue and carefully lay plastic sheeting over them (making sure the plastic touches all areas of the raised design.) Let cool.
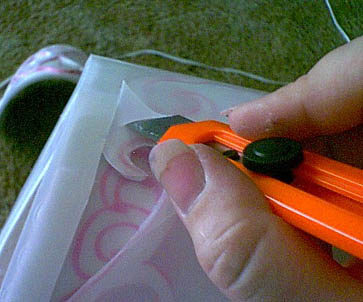
Now comes the fun part. (And by "fun" I mean, "hair-pulling-ly frustrating".) What you do is take a craft or X-acto knife and use it to carve away all the plastic which isn't sitting on top of the swirly strips. (Or, to put it another way, all the excess plastic which ISN'T covering the raised design.) Polystyrene can be hell to carve when you're working with curves so be VERY careful. Use a light touch. (And when things get REALLY frustrating, please resist the urge to slash your own wrists with the craft knife. As difficult as that might be.)
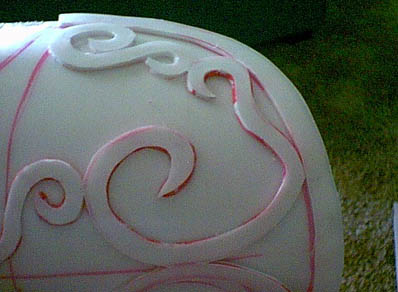
This is what you should have at the end of it all. A raised design with a smooth surface to match the surface below it. (For extra super-duper ADDED security, take a needle and thread and tack down the plastic edges of the raised areas with small, discreet stitches.)
Next, you begin painting the individual pieces of the armor. Begin by wiping the armor with your hand or a soft cloth, making sure there's no dust or strands of hotglue marring the surface. Next, you spray-paint the armor using testor's model spraypaint (or a good automotive spraypaint.) Here's what you should have at this point in the process:
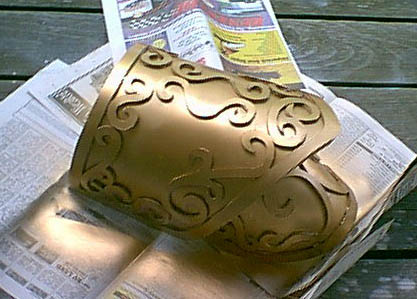
If you're happy with the paint job as it is, leave it. However, if you'd like to refine the look and make it more "antique-y", you can do that by mixing gold testor's paint with a little black and using it to paint in the depressed areas (making the raised design stand out a little more.)
Next you put the armor together. (If you're an idiot like me, at this point in the process, you'll realize that you made the shoulderpads a little too wide and you will have to carve off an inch on the inside of them to get the armor to sit square on your shoulders. Hopefully, you people are NOT idiots like me and will make certain you get the pattern right the first damn time.)
Next step: Hotglue all the pieces of the armor together. (For added security, run stitches through all the layers, dabbing paint onto any exposed threads to hide them.) The armor should be rigid, with just enough space at the top to allow your head to go through. (This is important. In fact, it's pretty much the whole point.) This armor isn't made to have movable plates or parts like some of the other armor I've worked on. It's important then, that you set the side plates in such a way that you can still move your arms freely. (That, too, is important.)
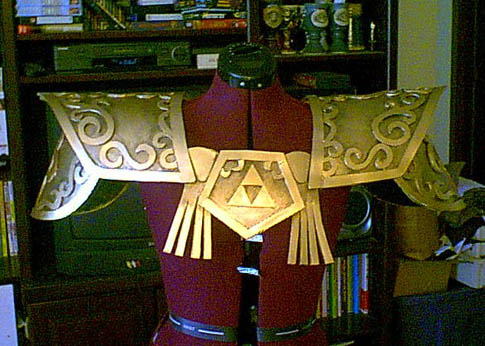
So now. This is what you should have:
Here's a side view:

And a view from the back:
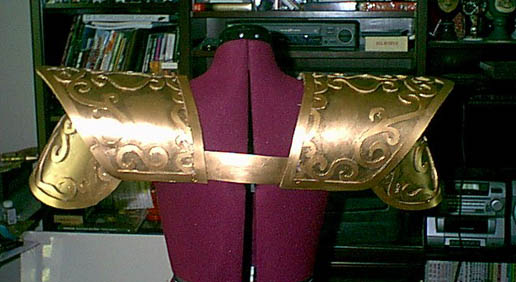
A plain plastic and foam strip in the back should be enough to hold the shoulder pieces together. You're pretty much finished with your Zelda Armor ensemble, except for the stuff on the belt (which you'll have to figure out for yourself as I never bothered to make it) and the headpiece and earrings.
I did manage to make the headpiece (which I thought would sweeten the deal when I sold this thing on ebay.)
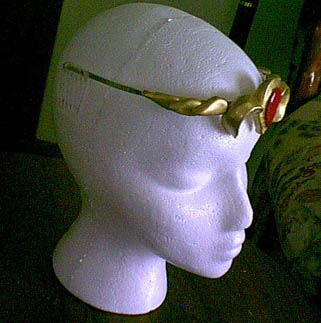
It was very simple, I went to a mall boutique and bought one of those cheap prom tiaras. I tore off the metal filigree which had been decorating the front of it and then glued pieces of sculpey in it's place. (One note, when painting sculpey, do NOT use the same paint that you used for the armor. Testor's model paint will NOT SET on sculpey. Use acrylic paint instead and then cover it with a satin varnish.)
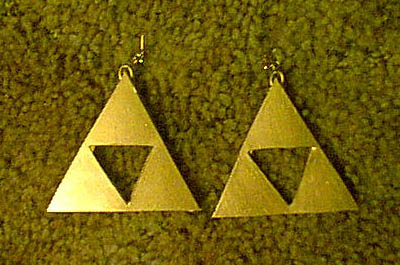
The earrings I made from a 2mm thick sheet of craft foam covered on both sides with plastic sheeting. (It's okay to paint THESE with the model paint...)
All in all, I think I did a good job. Even though I only got 75 dollars for the armor when I sold it on ebay, which is about half the reserve price I SHOULD have put on it, (and HALF the price I'll be asking if anyone decides to commission this piece from me in the future.) This piece has about a moderate-to-hard level of difficulty, (meaning it took me about 15 hours to make, not counting the headpiece and earrings. Of course...)
Well that's all for now, folks. See ya next time!
Back to the Main Armoring Page