

Guide to Materials Most armor you'll make will require the following supplies:
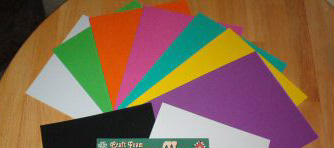
Craft Foam
(Aka "Foamies")This stuff can be found at most craft and fabric stores and comes in various thicknesses and sizes. (Most common thicknesses are 2mm, 3mm, and 6mm and most common sizes are 8-1/2" x 11" and 11" x 17".) JoAnn's has the most variety of sizes, as of this date (but for some reason the thickest foam ONLY comes in 8-1/2" x 11" sheets so if you want to make something BIG -like a breastplate-, you're going to have to hotglue several sheets together edge to edge to make a sheet large enough to place your pattern on.)
Rigid Insulation Foam
This is a type of foam which is commonly used in the making of prop swords, weapons, etc. You can find it selling in most major hardware stores, and it comes in large, flat (often pink) sheets. In appearance and texture, it resembles a thick styrofoam. If you are going to make an oversized sword with this material, it's usually a good idea to use a slab that's at least 1" thick. It's also a good idea to seal the surface of the foam somehow, either by coating it with bondo or fiberglass, or by gluing large sheets of thin styrene (ABS plastic) over it. Here is a good off-site tutorial which demonstrates how this material can be used to create a large, oversized weapon.
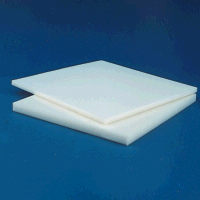
Polystyrene Sheeting
This will be, by far, the hardest item to locate. This is what it looks like: a thin sheet of translucent or white plastic, having a smooth surface, flexible enough to be bent, and thin enough to be cut with a scissors. It's most often sold in small, office-paper sized sheets, but it can sometimes be bought in large rolls. I buy mine directly from the granite company where I used to work (and where I have to show up in person and buy it directly. They, in turn, buy it from T O Plastics Inc, Clearwater, MN 320-558-2407. ) You can try searching for a commercial plastic retailer in your area. (Check the yellow pages under Plastics).
Glue Gun and Glue Sticks
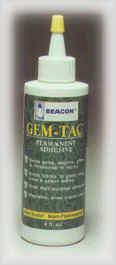
GEM-TAC Adhesive
This stuff can be can be found at Hancock's Fabrics and Michael's Crafts (and at many other stores, I'm sure,) and I find it's useful for applying raised designs to my armor. Unlike Tacky Glue, this stuff gels quickly, sticks to styrene really well, and is waterproof. (It takes about a day to dry and a few days to fully cure.)
It ain't cheap (It costs around 6 bucks a bottle,) but for what it can do, I'd say it's well worth it.
Other Materials You Need
Scissors-- I recommend a nice heavy, high-precision scissors--something that will clip through soft plastic and leave nice, sharp edges on your craft foam. Cheapie, orange-handled scissors (like the kind you find at Wal-Mart) probably won't cut it. (No pun intended)
One alternative to buying craft foam from craft stores is to buy an industrial-grade version of it directly from an online supplier, like McMaster-Carr.com. (Do a search for EVA foam on their website.) This gives you the advantage of buying it in larger sheets and at greater thicknesses.
Once you have the craft foam in your hands, you must then face the problem of what size and thickness of foam to use for your particular project. As a general rule of thumb, anything structural (that is, anything that will have other pieces of armor or raised decorations glued, strapped, or otherwise attached to it--like breastplates or bracers) should be made using 6mm (1/4") thick foam. Anything that's really small or that has movable or overlapping plates should be made out of 3mm (1/8") thick foam.

There are online sources where the plastic can be found, and plastic suppliers who might have it in stock. Hobby/Model shops such as fantasyworldhobbies.com, and http://www.evergreenscalemodels.com/ are also good places to look. You can also try searching the Thomas Register Online Database for a company that sells this kind of sheeting. (Thanks to Rydain for this tip.) If all else fails, you could try searching Ebay.com for the stuff. A search under "styrene" should yield good results. I've noticed a few sellers selling larger sized sheets for use in vacuum-forming. The official name for this sheeting is polystyrene and it's actually the exact same thing as ABS plastic-- although the kind I use for my armor method comes in thin, translucent sheets, about the thickness of a sheet of tagboard (.020 - .030 inches --.020 works best if you want to bend the plastic in any way. Slightly thicker plastic is good for covering swords or other long, smooth surfaces.)
Let me repeat that. The thickness of the plastic you buy should be .020 - .030 inches. --It's not the thick variety usually associated with the making of plastic armor (which usually has to be heated in an oven to get it to bend.)
Cost of the plastic I buy runs me about 8 dollars per 40" x 84" sheet (although I do get it at a discount. It will probably cost you a little to a lot more, especially if you factor in the cost of shipping.)
THIS IS ALL I HAVE TO SAY ABOUT STYRENE, IT'S APPEARANCE AND THICKNESS, AND WHO MIGHT SELL IT. BELOW IS A LIST OF PLASTIC RETAILERS WHICH PEOPLE HAVE SENT IN TO ME:
A reader Wig Designer World of Wigcraft, sent me a link to an online ebay store which seels styrene sheets in many sizes:
http://stores.ebay.com/Jims-Modeling-Corner
Canadian Cosplayers - alert reader, Aaron, sent me a link to a place where they sell 4'x8' sheets of .030 polystyrene for about $20.00 CDN each. (Located about 50 minutes out of Toronto in Hamilton.)
http://www.paplastics.com/
Yet another alert reader, Junta, sent me some links to plastic suppliers in the UK:
Modeller's Mate
J. Perkins Distribution (Plastic only sold in A4 sized sheets)
Eagle Plastics
Tony of the Replica Prop Board posted this link:
Bay Plastics
Thanks to everyone who sent me links. If anyone else out there knows of a good place where this type of plastic can be purchased in person or online, please e-mail me and I'll post the information on this website.
One more note: the plastic I buy is translucent. The kind you buy may not be, but that shouldn't affect it's properties (although it might affect the way you use it. I'll go into more detail about this later.)
Note: An alternative to using plastic, is to coat the surface of the foam with a sealer of some sort. (The craft foam tutorial I mentioned earlier suggested tacky glue for this purpose.) A reader named Drenn tells me that Zinsser Bulls Eye 1-2-3 is also a good sealant to use. There are also resin coatings and foam fillers that can be used as well, but I usually find it's simply easier to glue plastic over the foam, rather than try and seal it, unless the foam is bent or positioned in such a way that I can't fit the plastic over it.

A decent glue gun should run you about 20 bucks and you can find them for sale at most fabric and crafts stores. A glue gun is used for melting sticks of thermal adhesive (what will heretofore be referred to as hotglue) and applying them to...whatever it is you want to apply them to. What's nice about hotglue is that it's good at bonding the craft foam and plastic together and is good for filling in cracks and spaces. (It can even be used as a molding compound. Just impress a shape into modelling clay, pull it out, squirt hotglue into the shape it leaves and then tear away the clay once the glue cools and sets. I once made a whole set of Sesshoumaru armor horns that way.) The best brand of hotglue to use is the all-purpose kind they sell at Michaels craft stores. (I've used other glue brands only to find they don't bond as well.)
This is what I've been able to do with it so far... (Click to enlarge the picture.)

Craft (X-Acto) Knife-- For precision carving. Try to buy one with as heavy a blade as possible--you don't want it snapping off in the plastic in mid-cut and the blade flying up and hitting you in the eye or some other equally useful and sensitive body part. Box cutters (the kind with disposable blades) are also a good choice.
Needle and Thread. - Make sure they're heavy, but not TOO heavy. (You'll have a tough time pulling a needle through plastic if it's the size of a cable. On the other hand, you don't want your needle to break on you.) You can expect to have your needles bend on you from time to time though, so you'd best keep a steady supply of them on hand.
Craft Pliers - The needlenose variety. Useful for grasping onto needles and pulling them through layers of foam and plastic.
Paint - I'll elaborate more on this in the How to Paint Your Armor Section later.
Buttons, jewel settings, rhinestones, studs, etc... - for decorating your armor. Plastic pearl buttons make excellent rivets and will take paint well. You can buy decorative (and cheap) plastic buttons, gemstones, and jewel settngs at Michael's and other craft stores.
Plastic Christmas Ornaments - They can be cut in half with tinsnips or a heavy scissors, and their highly reflective surfaces make excellent gemstones. (If you've ever cosplayed a CLAMP character, you know that some anime character costumes have HUGE jewels in them. These work great for those.)
PVC Pipe - Useful in making handles for staffs and swords. What it is is a hollow plastic tubing which can be sawn off to any length. (Ask the folks at the hardware store to cut it for you, if you don't feel like cutting it yourself.)
Silver Vinyl - A certain costumer in Japan has a method for making armor which involves heat-shaping craft foam, then covering it with silver/colored vinyl. (It's too bad his site is in Japanese, so his methods can only be inferred from his pictures.) Here's a website which does offer an English translation of this method, if you're interested...
Tagboard and Newspaper - These items will come in handy when it comes to making your armor patterns. Tagboard will behave a lot like your plastic sheeting, so it's the best choice to use for patternmaking.
On to Page 3 : Making your Pattern
SUPPORT THIS PAGE!
All anime characters featured are copyright their respective owners.
All costumes created by and all pictures property of Amethyst Angel c. 2005
