Got a dime to spare? How about donating to my "Keep A Costumer From Starving" fund?
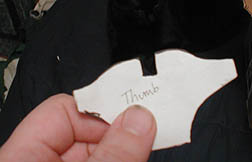
So I print and cut out the patterns for my fingerplates. As I'm doing so, I write down the name of the finger that the plate corresponds with, so I don't accidentally mix them up:
Now if you've done some armormaking with .020" styrene sheeting and have a lot of scrap pieces lying around, here's a golden opportunity to get rid of them. Any pieces that are smaller than 4" x 4" are probably safe to get лучшие фриланс биржи rid of, but anything that size or larger are an ideal size to cut automail fingerplates out of.
After cutting out all of my styrene fingerplate pieces, I took a pencil and labelled them just like I had the paper pattern pieces, so I wouldn't get them mixed up. It was now time to coat the styrene pieces with vinyl. I began by cutting out a nice non-wrinkled section from the vinyl that was about 8" x 10", which I placed onto my work surface, vinyl side down. To get my styrene pieces to stay in place on the back of the vinyl as I cut around them, I would use plain old Elmer's glue.
Here's a short video of the gluing and vinyl-coating procedure for my fingertip plates. (Please excuse the bad quality, as I was still getting the hang of my webcam at this time...)
Once all of the fingertip pieces in my project had been coated, it was time to make them "3-D" so they would fit over my thick, cylindrical fingers.
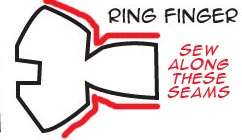
Here's a fingertip pattern. The lines in red indicate the edges which will have to be connected to each other. Connecting the seams is done via a needle and four-ply thread.
This next little video deals with that process:
Once all of the fingertip pieces have been made (and the patterns for the knuckle pieces properly shaped and fitted,) it's time to coat ALL of the styrene pieces with vinyl. (The knuckle fingerplate pieces are easier to coat than the fingertip pieces, since their shapes are a lot simpler. Sewing the knuckle seams closed is also considerably easier.)
Hopefully, you're keeping good track of which fingerplate goes to which finger, (re-labeling the interiors of the pieces if you have to) as once you've finished with the coating and the seam-sewing of the fingerplates, it's time for the next step:
Now that all of the finger armor is finished, it should be set aside. It is now time for the next part of this tutorial, making the hand...